
|
WI-Roc!
This is a thread for all things related to Woosh's very own Loc/Precision WI-Roc, a group build for 2018!
Feel free to post your build progress, tips and tricks, discussion relating to contests, rules, and trophies, and so on. As of 1/20/18, we're looking at 30 or more WI-Rocs that will take shape and rule the skies in 2018! Join in the fun, and share in the fun here!!! [IMG] 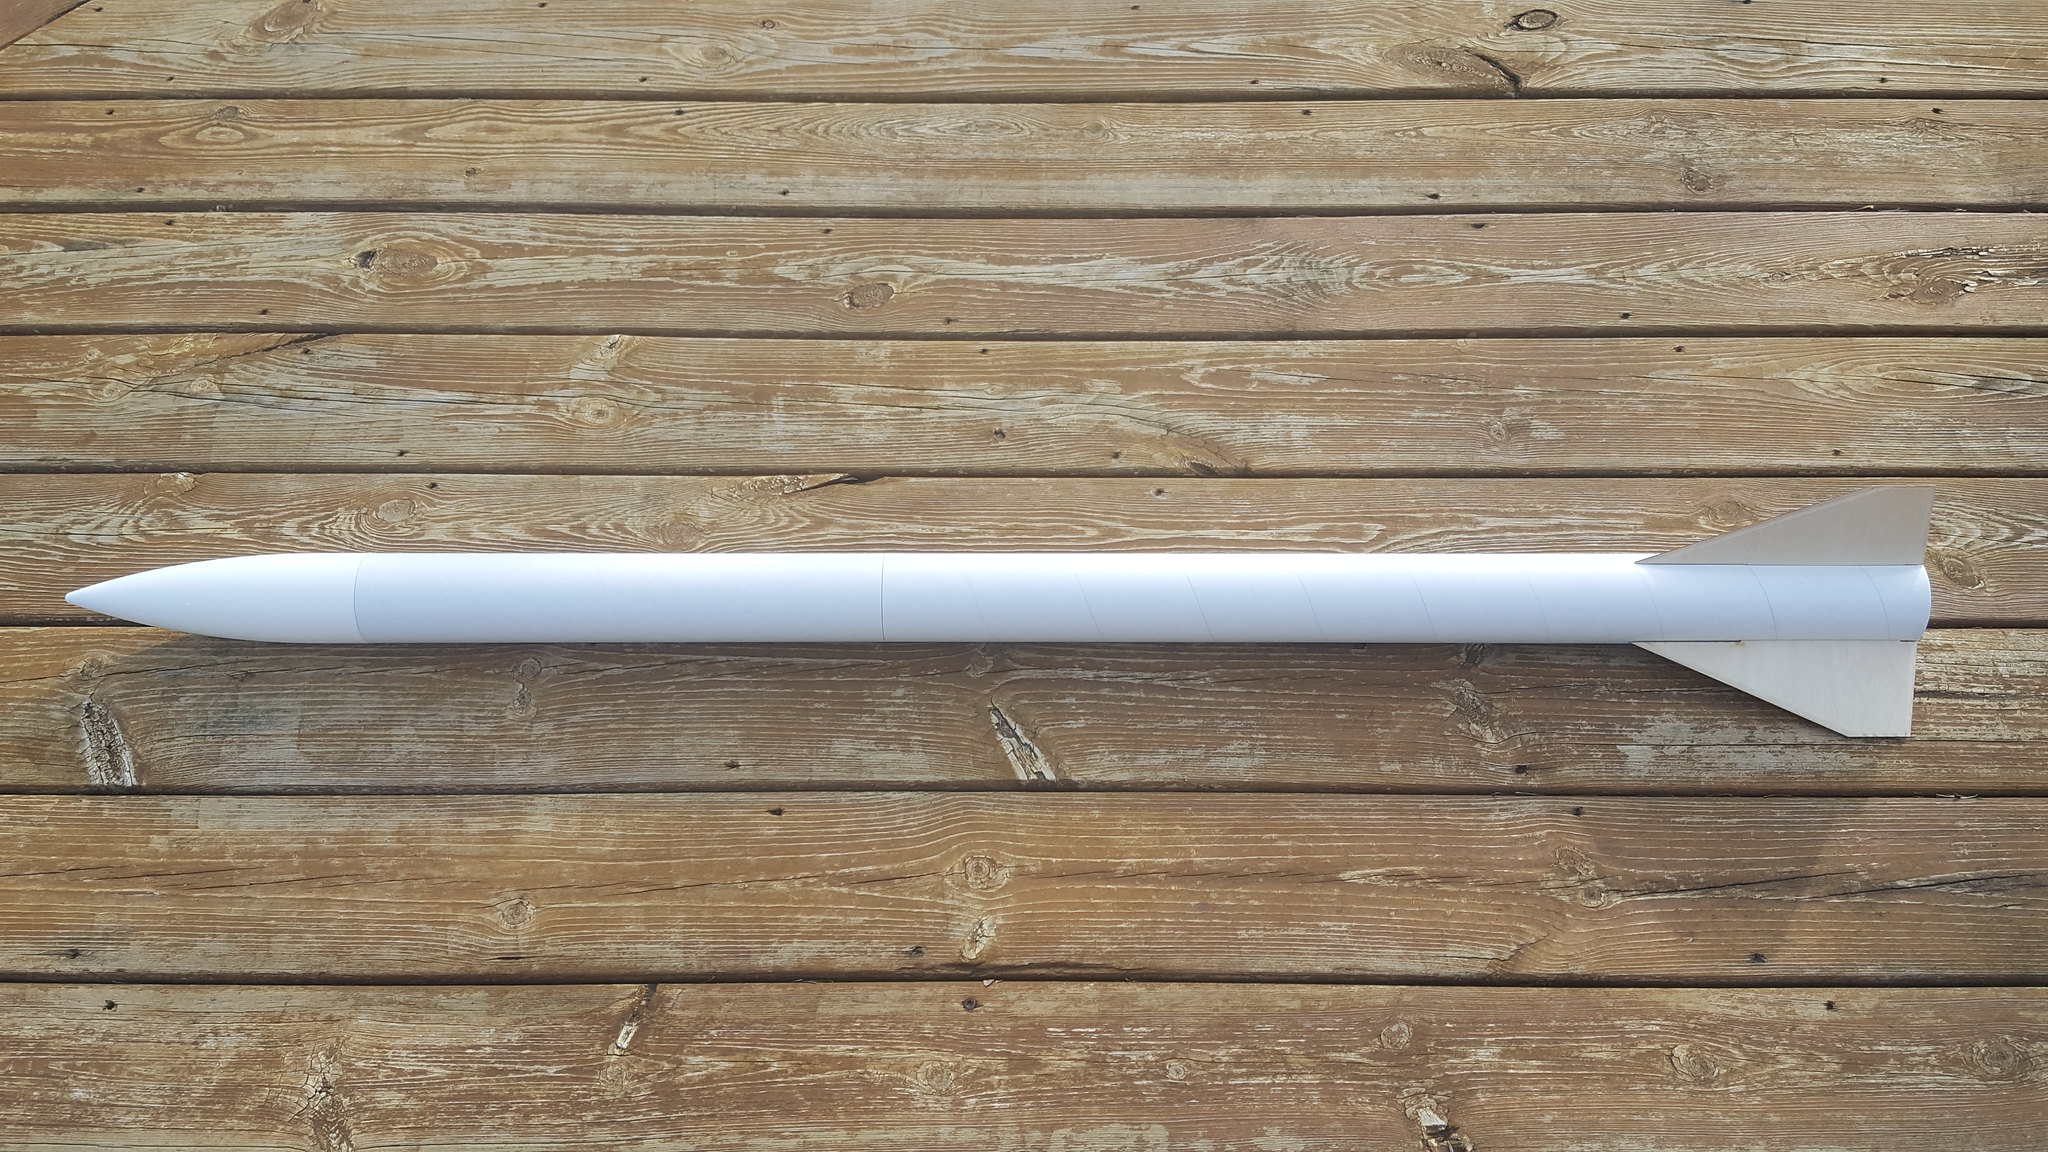 [/IMG] [/IMG] |
That rocket planform looks quite similiar to several past kits.
|
Quote:
Well sure. Some parts utilized in this design have been around since the 80's...arguably since the birth of HPR! Some features of this Woosh-exclusive are "Firsts" however for a Loc release; making it a bit "special" and unique. We'll see if it makes it into the real world as a formal release...in the meantime this is a special small run release for the Woosh Org. The intent of the design is a low cost rocket that can be built easily, catering to a myriad of rocketeers that fall under the Woosh umbrella. Flyable at Class 1 waiver-less events due to its light weight, yet strong enough to handle Level 1 motors without reinforcement, and Level 2 motors with a bit of reinforcement. Versatility is the key word; not too unlike many USR offerings. ;) There is only so much you can do with a trapezoidal fin planform after-all! |
Motor Mount
Since there are no agreed upon rules yet, I'll take the opportunity to customize my WI-Roc a bit. Starting off with the motor mount, I like the three ring arrangement. The rings are glued both fore and aft of the fin tabs, as well as near the front of the motor tube.
I did two modifications to the mount. 1. I added the tailcone/boat tail. A few reasons: I like a little tail on a rocket, the U-Roc had them, and most importantly, I had a random chopped up section of a conical nosecone in my scrap box. 2. I replaced the screw eye in the forward ring with a #10-24 eye bolt. The screw eye was a bit of a loose fit, the 10-24" eye fit the pre-existing hole perfectly and I like the insurance of having a nut on the backside. The completed assembly: [IMG] 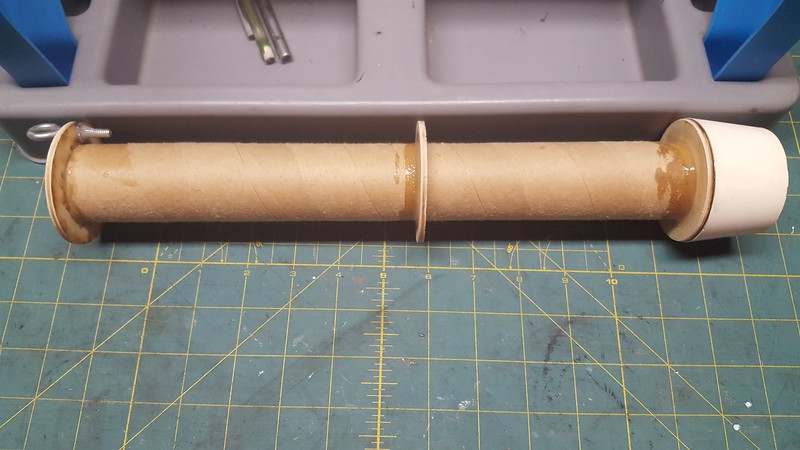 [/IMG] [/IMG] For cord attachment, I simply looped the cord through the pre-sewn cord. I found it fit better in the airframe when passing the cord from the motor tube side to the outside...like this: [IMG] 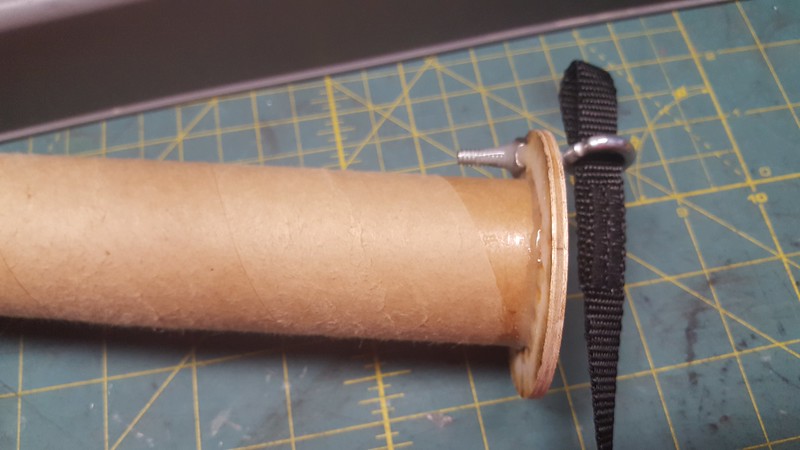 [/IMG] [/IMG] Pass the free end through the loop and pull tight. The resulting attachment point looks like this: [IMG] 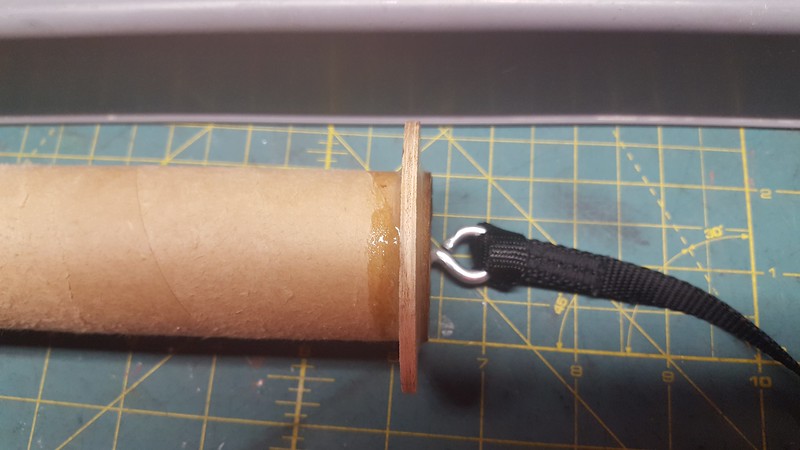 [/IMG] [/IMG] Don't forget to attach that cord before gluing the mount in the airframe! I almost did... :rolleyes: I glued the completed mount into the lower airframe....no photos of the step, sorry. Then I got distracted with other projects....squirrel! -Eric- |
1 Attachment(s)
Not nearly as far as Eric, but I did fill the spirals.
This will be my first MPR/HPR build in my new work space. That's what I'm looking forward to. |
ALL ABOARD the WI-ROC Express
Wow! I haven't been here in a while. Could there really have been 3,906 posts since my last visit? I Had to use 4 of my 5 passwords attempts and ended up with a new pass word anyhow. But I'm going to be hanging around this thread from now on. I haven't done anything so far on mine, but I will post a few pics as soon as I make some progress. That's if I remember how to do it.
I think this might be a good place to post contest recommendations and ideas too. I like the boat tail idea and will probably sacrifice a nose cone myself, Eric. Jump on the WI-ROC ( yeah, I'm going for all CAPS on the name) Post 'em if ya got 'em. This is gonna be good. -Walt |
Wi-roc / WrE / 2018 / DRY FIT
3 Attachment(s)
feeling my way through the dark.
testing photo posts DRY FIT WI-ROC PICTURES please..... |
Wi-roc / WrE / 2018
How dry I am.....WI-ROC DRY FIT
First look thoughts: Best Fins EVER. Beveled right outta the bag, NICE TOUCH LOC! TTW fin mounts are a must. Fin Slots are tight and accurate. AERO PACK retainer & Aero Pack 38-29 mm adapter means no tail cone on this WI-ROC Design features a substantial length and diameter and has a good looking profile. Everything fits well with just a little bit of edge sanding on centering ring. The WI-ROC comes as a first class kit. I can't wait to see what variables the WOOSHers will come up with. I don't think I'll win The First WI-ROC Completed Award. I just picked up a LOC Electronics Bay. I think it might come in handy to expand the versatility of the already super versatile WI-ROC. That's definitely down the road, but it's a good learning tool for me. |
Wi-roc / WrE / 2018 / MOTOR MOUNT
4 Attachment(s)
WI-ROC BUILD REPORT
Back again. This time I have begun the first step in any rocket build -even in ESTES rockets: Build the motor mount. The motor mount on the WI-ROC will accommodate a 38 mm motor. I bought a 38 to 29mm adapter for mine from LOC during our tour in January. It's an AERO PACK product. Nice! More on that later. While I'm talking about AERO PACK- that's an AERO PACK 38 mm aluminum retainer on the aft end. I mainly use low cure epoxy, scratch the inside of the mount and the outside of the motor tube. Move on to the centering rings, BOTTOM RING is right on the retainer. MIDDLE RING needs to be placed so fin tabs fit tight. Epoxy again - a Popsicle stick puts a good filet around any outside curve. TOP RING holds the Shock cord anchor. Has to be well supported. This is such a cool rocket. I want to use it to experiment with a number of technologies: Video Dual deployment and radio tracking or GPS tracking Most of these subject are pretty much unknown to me. I have a lot of plans for this rocket. I'll be taliking about that here. -Walt Next time I get baffled. |
bamboo skewers work well for applying adhesives and have a longer reach.
Rex p.s. looking good so far |
| All times are GMT -5. The time now is 05:52 AM. |
Powered by: vBulletin Version 3.0.7
Copyright ©2000 - 2024, Jelsoft Enterprises Ltd.