
|
|
|
|
#1
 01-21-2018, 10:24 AM
|
|||
|
|||
|
This is a thread for all things related to Woosh's very own Loc/Precision WI-Roc, a group build for 2018!
Feel free to post your build progress, tips and tricks, discussion relating to contests, rules, and trophies, and so on. As of 1/20/18, we're looking at 30 or more WI-Rocs that will take shape and rule the skies in 2018! Join in the fun, and share in the fun here!!! [IMG] 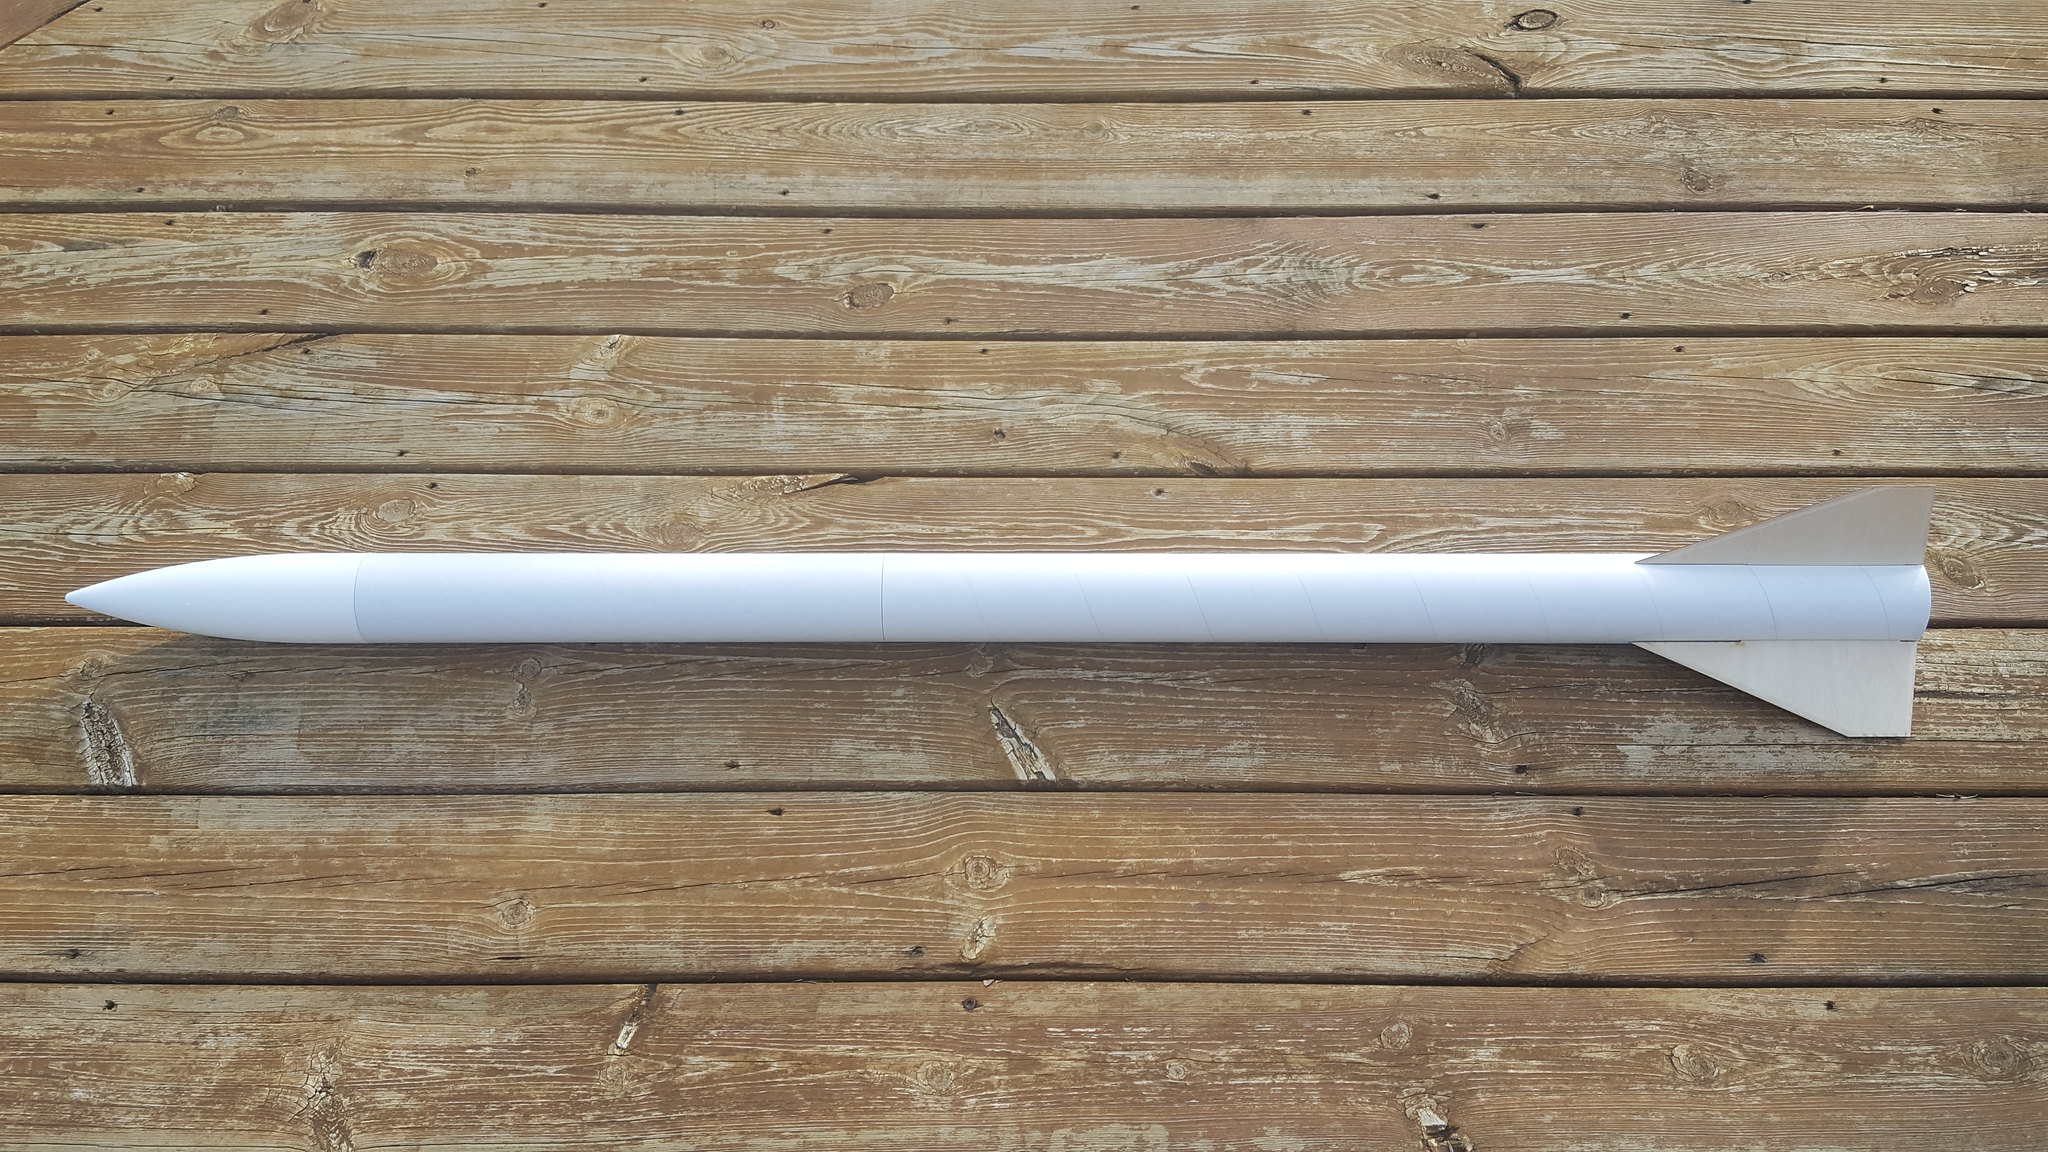 [/IMG] [/IMG]
|
|
#2
01-21-2018, 01:11 PM
|
||||
|
||||
|
That rocket planform looks quite similiar to several past kits.
|
|
#3
01-22-2018, 07:07 AM
|
|||
|
|||
|
Quote:
Well sure. Some parts utilized in this design have been around since the 80's...arguably since the birth of HPR! Some features of this Woosh-exclusive are "Firsts" however for a Loc release; making it a bit "special" and unique. We'll see if it makes it into the real world as a formal release...in the meantime this is a special small run release for the Woosh Org. The intent of the design is a low cost rocket that can be built easily, catering to a myriad of rocketeers that fall under the Woosh umbrella. Flyable at Class 1 waiver-less events due to its light weight, yet strong enough to handle Level 1 motors without reinforcement, and Level 2 motors with a bit of reinforcement. Versatility is the key word; not too unlike many USR offerings.  There is only so much you can do with a trapezoidal fin planform after-all!
|
|
#4
01-26-2018, 11:46 AM
|
|||
|
|||
|
Since there are no agreed upon rules yet, I'll take the opportunity to customize my WI-Roc a bit. Starting off with the motor mount, I like the three ring arrangement. The rings are glued both fore and aft of the fin tabs, as well as near the front of the motor tube.
I did two modifications to the mount. 1. I added the tailcone/boat tail. A few reasons: I like a little tail on a rocket, the U-Roc had them, and most importantly, I had a random chopped up section of a conical nosecone in my scrap box. 2. I replaced the screw eye in the forward ring with a #10-24 eye bolt. The screw eye was a bit of a loose fit, the 10-24" eye fit the pre-existing hole perfectly and I like the insurance of having a nut on the backside. The completed assembly: [IMG] 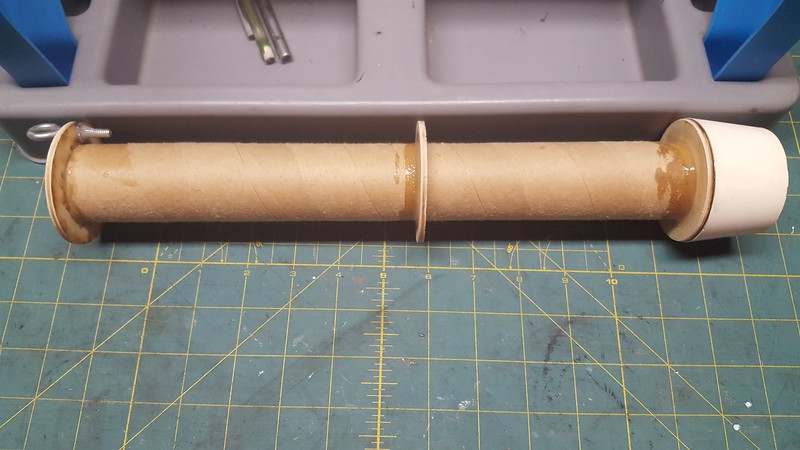 [/IMG] [/IMG] For cord attachment, I simply looped the cord through the pre-sewn cord. I found it fit better in the airframe when passing the cord from the motor tube side to the outside...like this: [IMG] 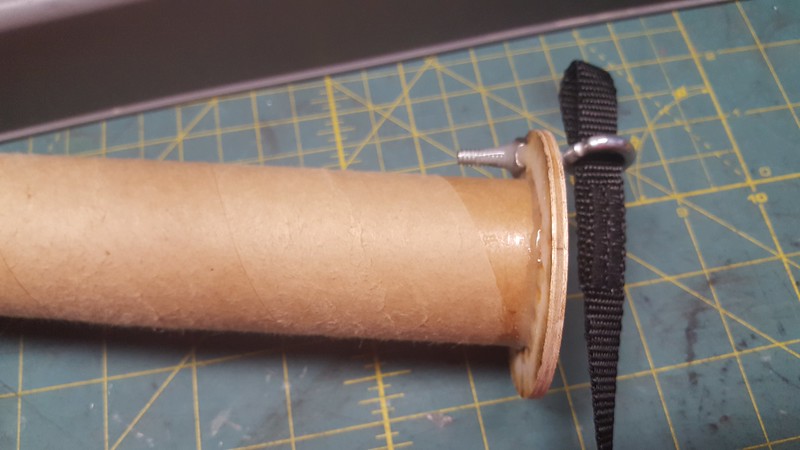 [/IMG] [/IMG] Pass the free end through the loop and pull tight. The resulting attachment point looks like this: [IMG] 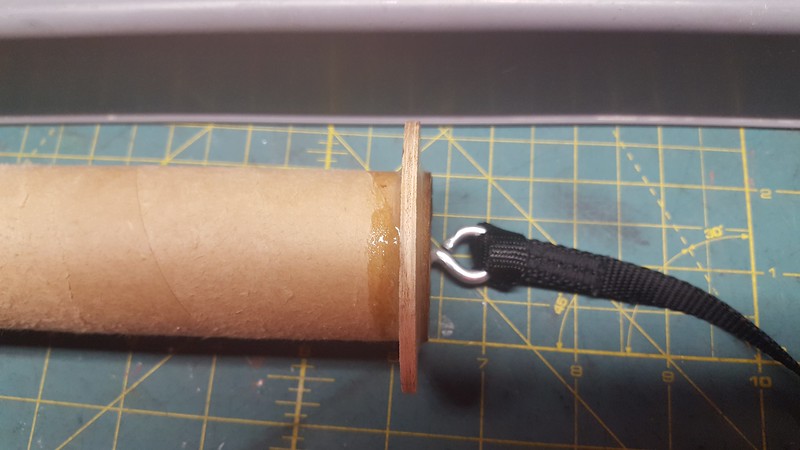 [/IMG] [/IMG] Don't forget to attach that cord before gluing the mount in the airframe! I almost did... ") I glued the completed mount into the lower airframe....no photos of the step, sorry. Then I got distracted with other projects....squirrel! -Eric-
|
|
#6
01-26-2018, 04:31 PM
|
||||
|
||||
|
Wow! I haven't been here in a while. Could there really have been 3,906 posts since my last visit? I Had to use 4 of my 5 passwords attempts and ended up with a new pass word anyhow. But I'm going to be hanging around this thread from now on. I haven't done anything so far on mine, but I will post a few pics as soon as I make some progress. That's if I remember how to do it.
I think this might be a good place to post contest recommendations and ideas too. I like the boat tail idea and will probably sacrifice a nose cone myself, Eric. Jump on the WI-ROC ( yeah, I'm going for all CAPS on the name) Post 'em if ya got 'em. This is gonna be good. -Walt Last edited by WRE : 02-11-2018 at 03:38 PM. Reason: WI_ROCK! ? WE_ROC?? ....WI-ROC
|
 |
| Thread Tools | Search this Thread |
| Display Modes | |
|
|


 Hybrid Mode
